OPC Viewer Connection Establishment |
OPC Viewer is a free software tool that is very useful for developers, testers, integrators, and others using OPC. OPC Viewer has the functionality of saving current configuration in a file called session. This session file is compatible with the DataPorter configuration file, that’s why OPC Viewer is the recommended configuration tool for DataPorter. DataPorter package contains OPC Viewer application with a special license that enables the Processing Environment editor. |
To start OPC Viewer select:
Start Menu -> All Programs -> CAS -> DataPorter -> OPC Viewer
The main window appears (See Main Window)
Connect to OPC Server
To connect to OPC Server, select <Browse…> from the Server dropdown list.
Figure 1: OPC Viewer – main windowClick the Add icon in menu (
 )
)
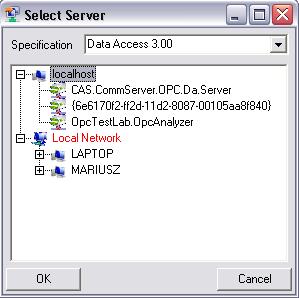
The Select Server window appears (Figure 2); select OPC Server from a local or remote computer (e.g. CAS.CommServer.OPC.Da.Server):
Figure 2: OPC Viewer – Select Server WindowIf you want to connect to a server on a remote computer, select the computer and check what servers are available (to check available servers click on “+” next to the computer name). If the requested computer is not on the list it is possible to connect to this computer using its IP address written in the input box on the address bar:
opcda://computer_ip_address/progID_OPC_server
 Note
NoteRemember to configure DCOM properly before connecting to the other computer.
The added OPC server is not connected (
 ).
).
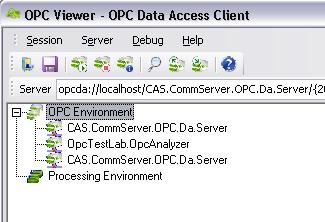
You can add a multiple OPC server to the configuration. It can be the same OPC server or any other OPC server.
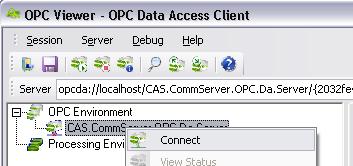
Figure 3: OPC Viewer – multiple OPC serversClick the right mouse button on the added server and select “Connect” or click “Connect to Server” icon (
 ) in the menu.
Figure 4: OPC Viewer – Connect
) in the menu.
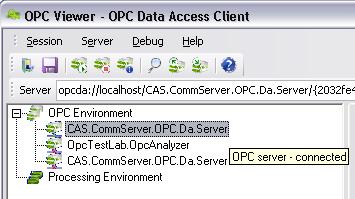
Figure 4: OPC Viewer – ConnectAfter successful connection to the OPC server, the icon changes to
 and we can create an online subscription.
Figure 5: OPC Viewer – successful connection
 Note
NoteWhen we are not connected to the OPC server we can create an offline subscription.
Now we can check the status of the connected OPC server. Click the right mouse button on the OPC server and select “View Status” or click icon (
 ) on the toolbar.
The Server Status window appears:
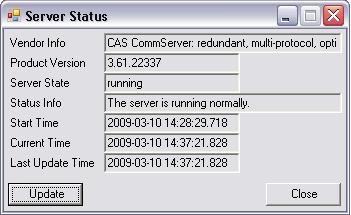 Figure 6: OPC Viewer – Server Status

