Preparing for test - computers configuration |
Create the same account: opc on both the computers with the same password: 123@opc
Pass to DCOM settings; do the following actions on both computers: Start Menu -> Run -> dcomcnfg. The following window should appear:
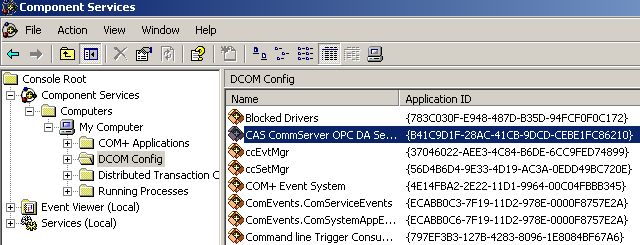
Click on “Component Services/Computers/My Computer”. On “My Computer”, press the right mouse button and select “Properties” (Figure 2).
Default Properties
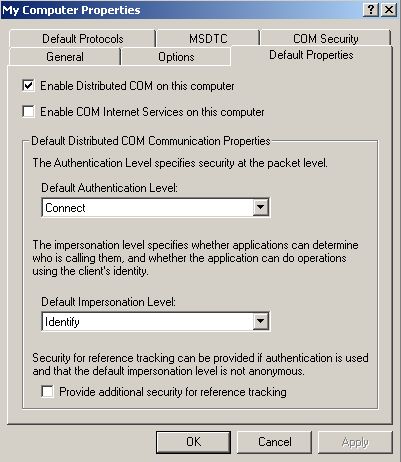
Select “Enable Distributed COM on this computer”. Select Connect for “Default Authentication Level”, and Identify for “Default Impersonation Level”.
COM Security
Figure 3 “COM Security” is another important tab.
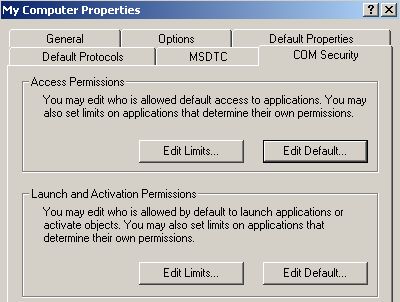
Select “Edit Limits” and “Edit Default” for Access Permissions (Figure 4):
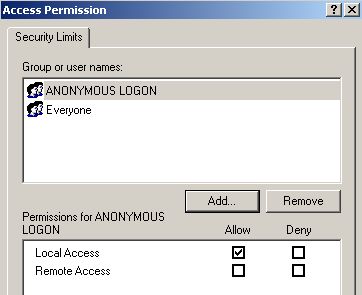
add: Administrators, opc, System, or the user Everyone to “Groups or user names”
select Allow for each of the a/m users for “Local Access” and “Remote Access”
Select “Edit Limits” and “Edit Default” in Launch and Activation Permissions (Figure 5):
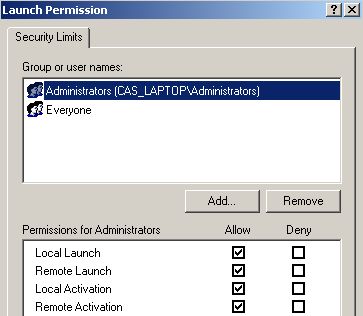
add: Administrators, opc, System, or the user Everyone to “Groups or user names”
select Allow for each of the a/m users for “Local Launch”, “Remote Launch”, “Local Activation”, “Remote Activation”
Other tabs
To be left unchanged. Finish the edition of properties with OK.
DCOM Config
Now return to the application main window. Click DCOM Config in “My Computer” subgroup. A list of components will appear in the right window. Select CAS CommServer OPC DA Server, click the right mouse button and select “Properties” (Figure 6 shows the selected object).
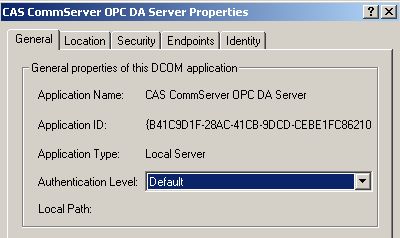
General
Select Default in the “Authentication Level” field.
Location
Select “Run Application on this Computer”.
Security
Select Use Default for “Launch and Activation Permissions”, “Access Permissions” and “Configuration Permissions”.
Endpoints
To be left unchanged.
Identity
Select “This user”, write down opc in the “user” field and 123@opc in the “Password” field.
In Windows XP and Windows Vista make sure that „Use Simple File Sharing” is disabled – if it is enabled it makes that everyone is authenticated as a Guest. You can do it with the any of the following ways:
Using folder options:
Doble click on „My Computer”
Select folder options from tools menu
Select view tab, find „Use Simple File Sharing (Recommended)” and make it unchecked
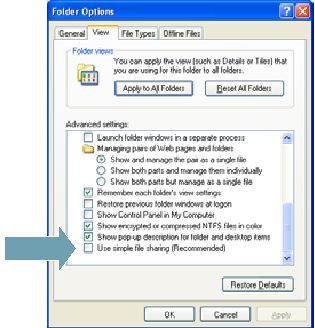 Figure 7: Folder options
Using local security options:
Launch Local Security Settings (Control Panel -> Administrative Tools -> Local Security Settings)
Select Local Policies -> Security Options
Double click on “Network Access: Sharing and security model on local accounts”
Select “Classical – local users authenticate as themselves” and click OK